Getting Started With Webhooks
To create your first webhook, there are a handful of steps you will need to take:
Creating and receiving webhooks does not require any special access, but sooner or later you will want to have access to the RECAP API endpoints. Send us a note with your username and use case to get that process started.
You need to create a URL on your server to receive events from CourtListener.
You need to configure CourtListener to send events to that URL.
Once you have created the URL on your server and linked it up to ours, you can send test events from CourtListener and you can wait for events to be triggered. As you send test events or events are automatically triggered, they appear in the logs section of your webhooks panel.
Read on to learn more about setting up your first webhook.
Receive a Webhook Event on Your Server
Webhook events are nothing more than HTTP POST requests sent to your server. To receive these events, you will need to begin by creating a URL in your application.
Some requirements to consider for the URL that you create:
- Our webhook system does not support authentication, so the URL you create should be long and random.
- Our POST requests will come from one of two static IP addresses,
34.210.230.218and54.189.59.91. We recommend only allowing traffic from these addresses. - Your URL must receive POST requests and should not accept any other HTTP verbs.
- If you are using a web framework like Django or Ruby on Rails, the webhook URL will need to be exempted from the cross site request forgery (CSRF) protection system. If this is not done, most web frameworks will block POST requests from outside domains like ours.
- To avoid timeout errors and event retries, your application may need to process events asynchronously.
- Your application must respond to events with a 2xx HTTP status code or else the event will be retried.
- Your application should use the Idempotency-Key included in the event headers to ensure that it only processes the event once.
Below are examples of endpoints configured in Flask and Django
Flask
Django
Set Up a Webhook Endpoint in CourtListener
To set up a webhook endpoint, begin by logging into CourtListener and going to the Webhooks panel in your profile:
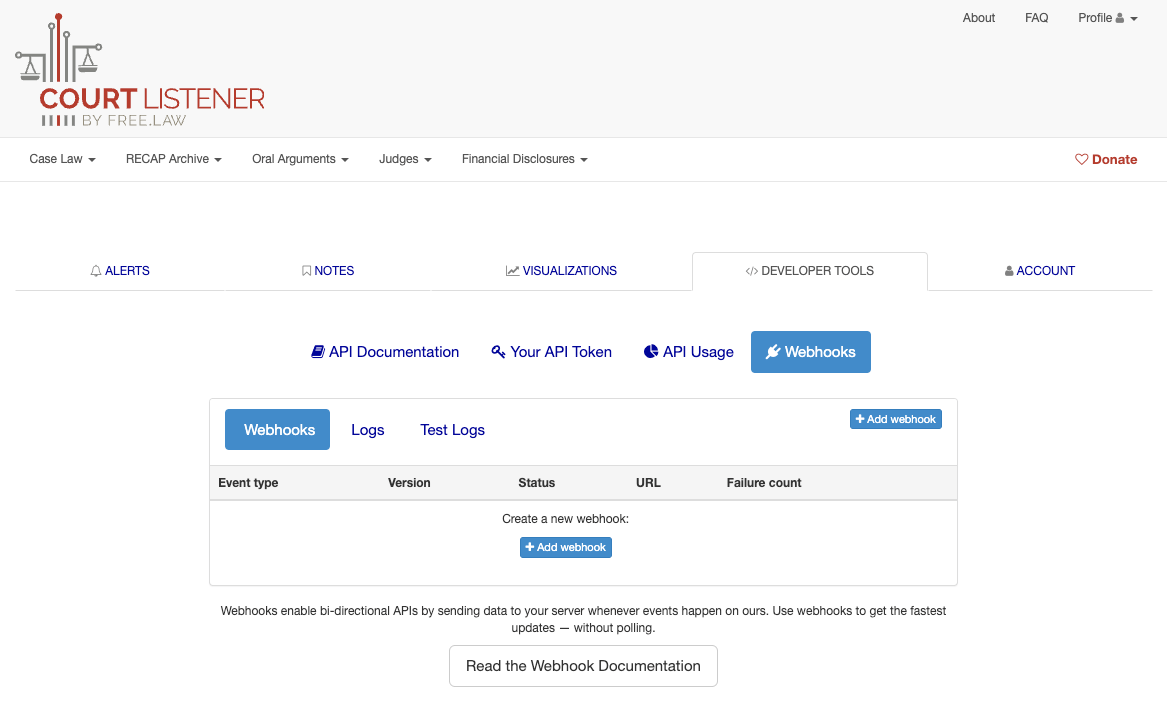
Click the “Add webhook” button and the “Add webhook endpoint” modal pops up:

Complete the box with the following information:
-
The Endpoint URL should be a URL on your server that is long and random. It must be securely served with valid HTTPS.
-
Select the Event Type for which you wish to receive events.
-
Choose the webhook version you wish to set up.
We recommend selecting the highest available version for your webhook. Refer to the Change Log for more details on webhook versions.
You can only create one Webhook endpoint for each type of event and version. Please get in touch if this limitation causes difficulty for your application.
-
If you are ready to start receiving events at that URL, check the box to enable the webhook.
In order to avoid unnecessary errors and retries, we recommend keeping your endpoint disabled until it is live in your application.
Click “Create webhook”
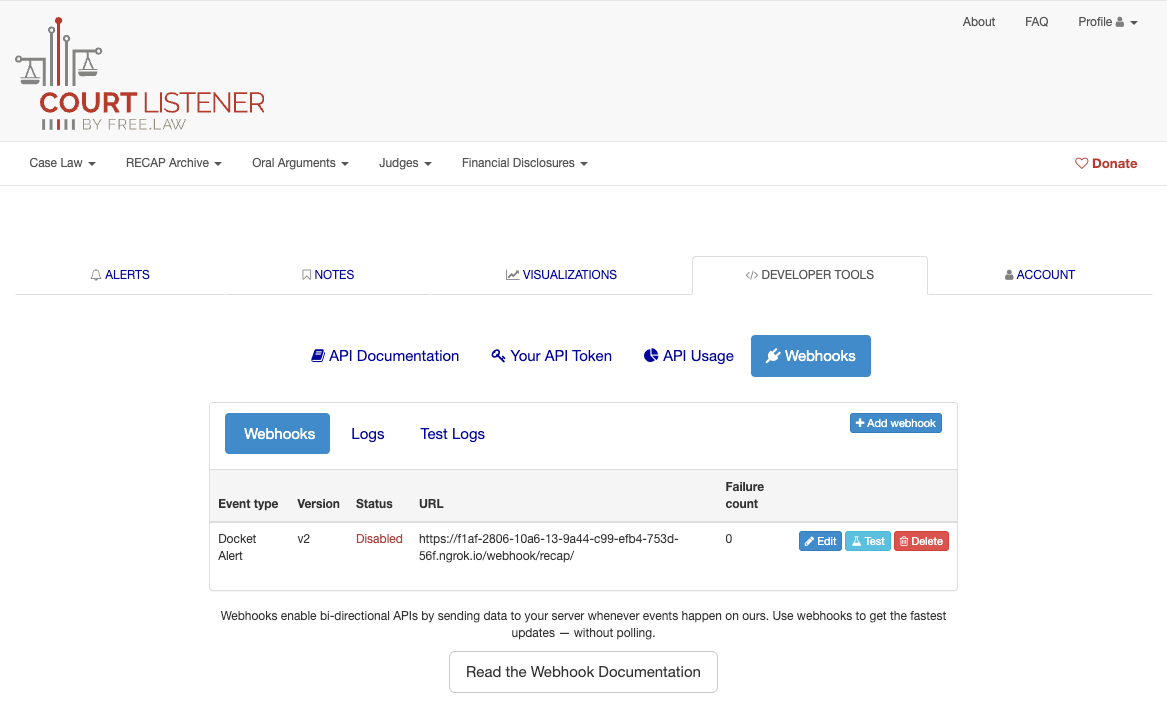
Your Webhook endpoint is now created:
Testing a Webhook endpoint.
Getting a webhook working properly can be difficult, so we have a testing tool that will send you a sample webhook event on demand.
To use the tool, go to webhooks panel and click the “Test” button for the endpoint you wish to test:
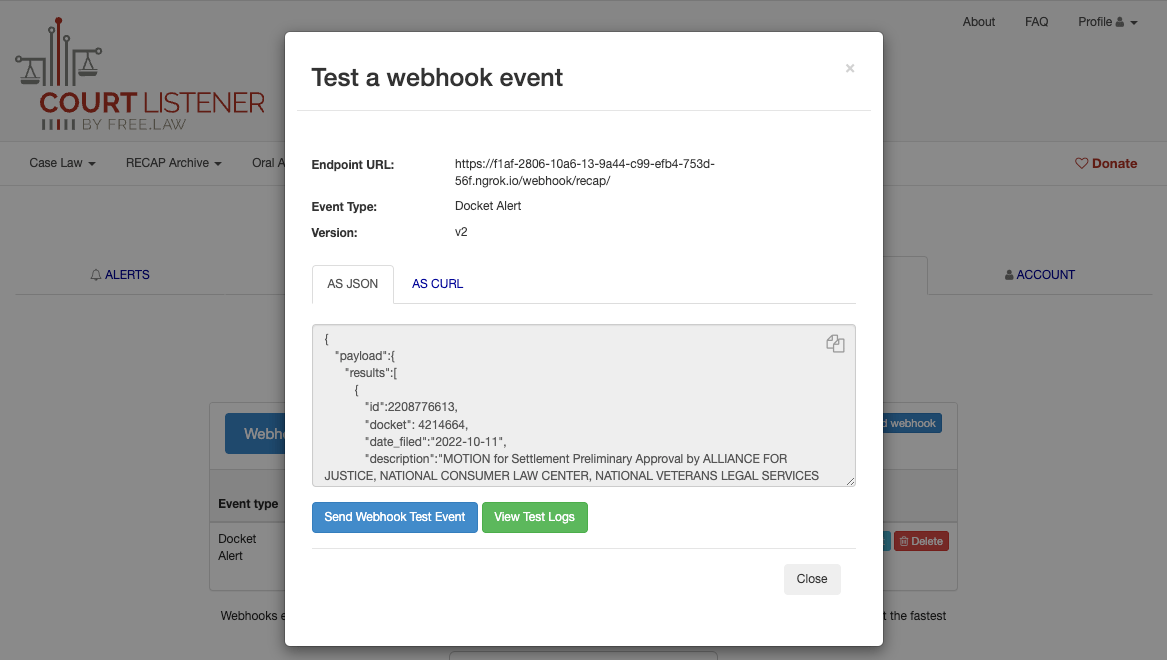
In the modal that pops up, there are two methods to test your webhook endpoint.
-
In the “As JSON” tab, you can ask our server to send a test event to your endpoint. When you click “Send Webhook Test Event” a new event is created with the information shown and is sent to your endpoint. Test events are not retried, but can be seen in the “Test Logs” tab.
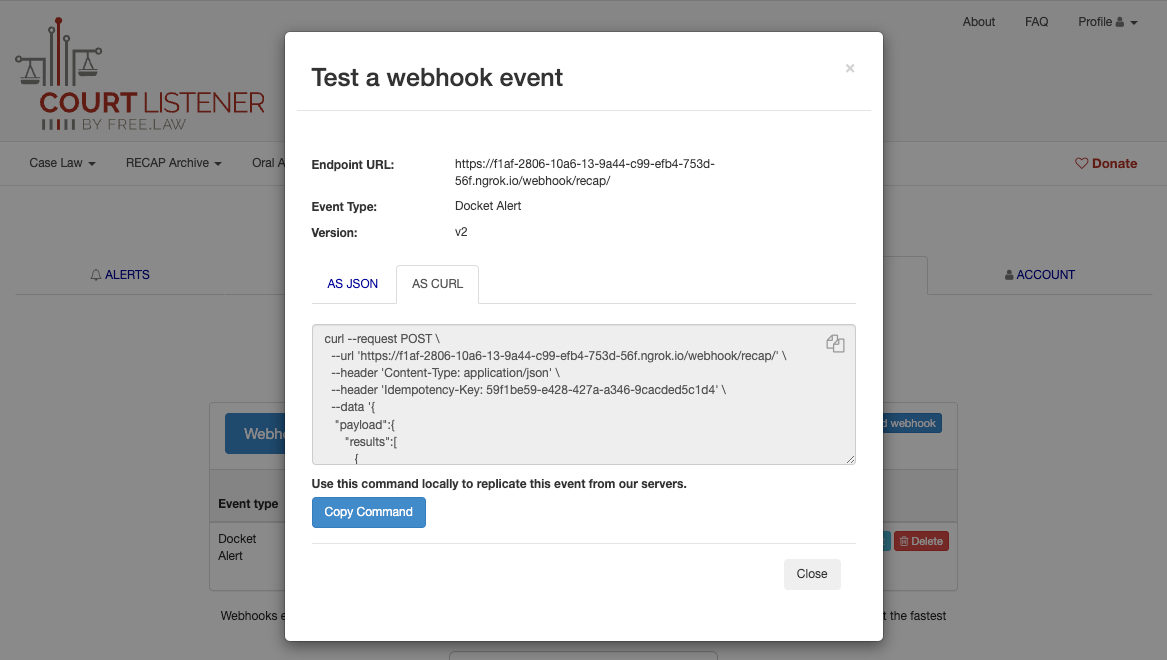
-
In the “As cURL” tab, you can copy/paste a curl command that can be used to send a test event to your local dev environment.
Use ngrok to test your local endpoint.
During the development process, you may want to test your endpoint in your local environment, before moving it to production. To allow CourtListener to reach your development machine over the Internet, you can use a tool like ngrok which will give you a temporary public HTTPS URL that you can use for testing. To learn more about this, read ngrok's documentation.